Tips and tricks
Amigurumi basics – single crochet decrease techniques
Oct
Lately I was asked how my decrease stitches look so smooth and unnoticeable. So I decided to talk about decreasing single crochet stitches. It`s an amigurumi basic technique which you will need almost all the time. I use two different methods, from which the invisible decrease is my absolute favourite. For those who love to make toys I highly recommend to learn it. You will achieve a lot better quality and you`re toys will look much better!

Regular decrease
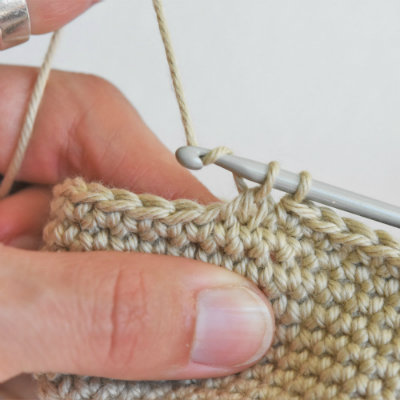
1. When you`ve come to the decrease part stick your crochet hook through the next stitch and bring up a loop. You have 2 loops on hook.
2. Stick your hook through the next stitch as well and bring up a loop. Now you have 3 loops on hook.
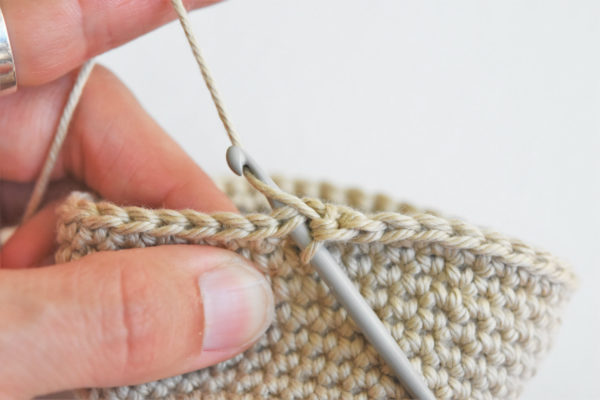
3. Take the yarn on your hook and bring through all three loops on hook.
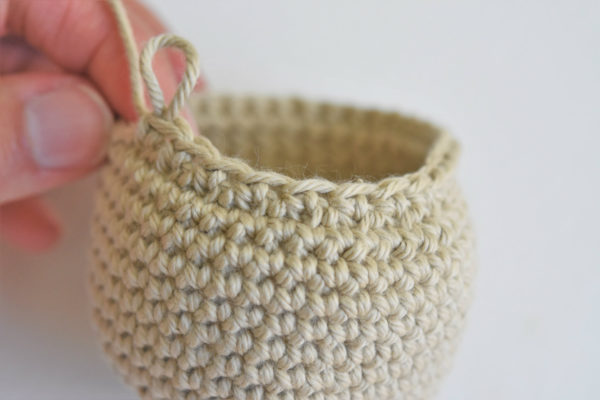
Here you will see regular decrease stitches in a row.
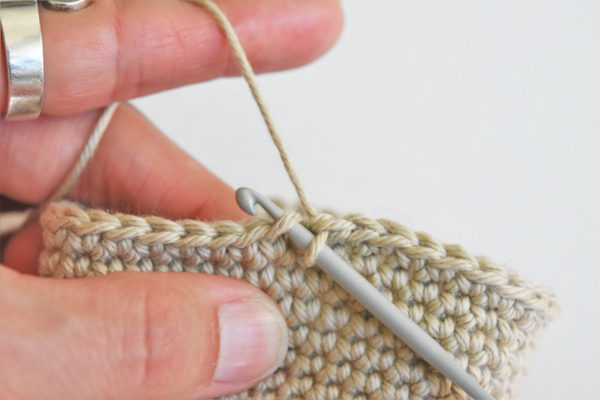
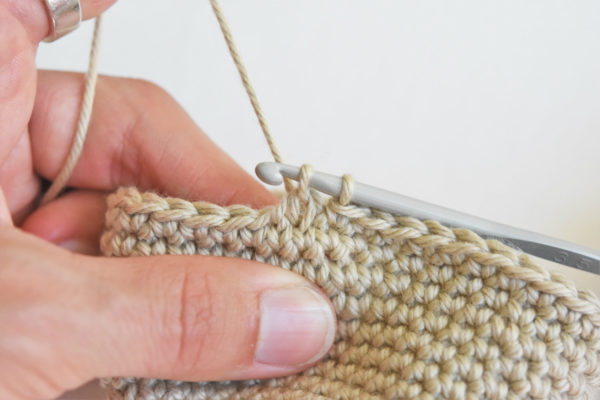
Invisible decrease
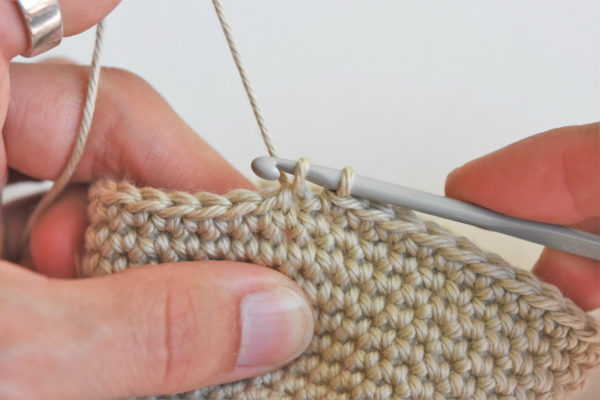
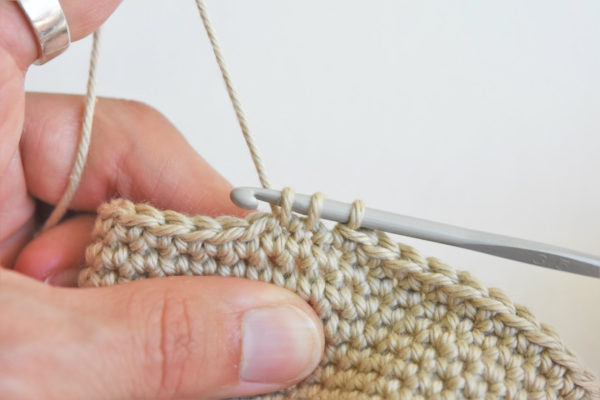
1. When you`ve come to the decrease part stick your crochet hook through the first loop of the next two stitches.
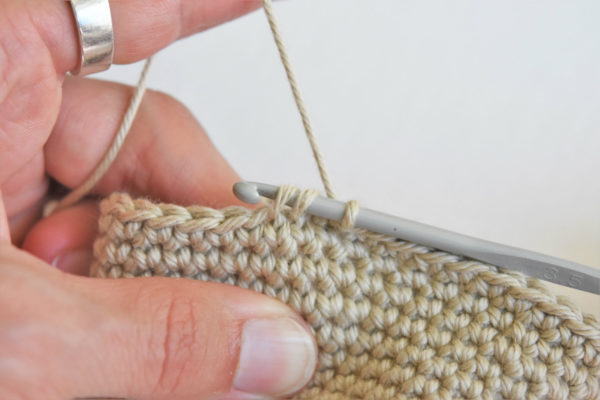
2. Take the yarn on your hook and bring through the first two loops on hook.
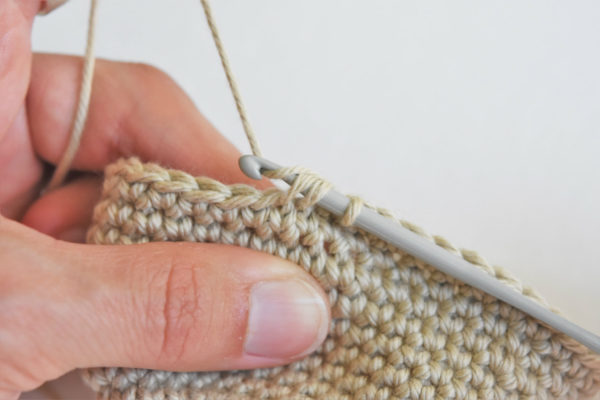
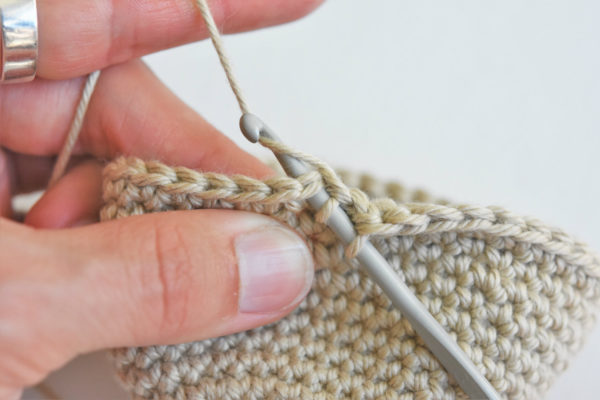
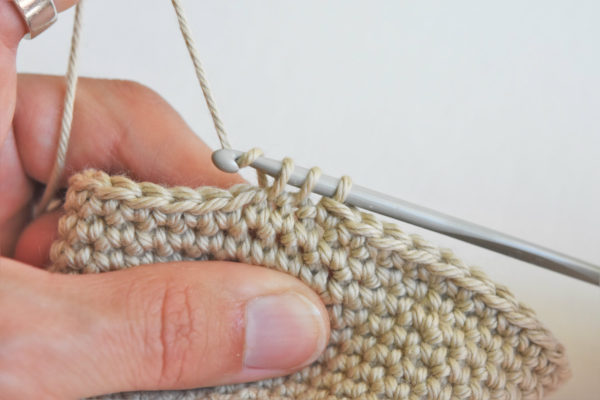
3. Take the yarn once more on your hook and bring through the remaining two loops on hook.

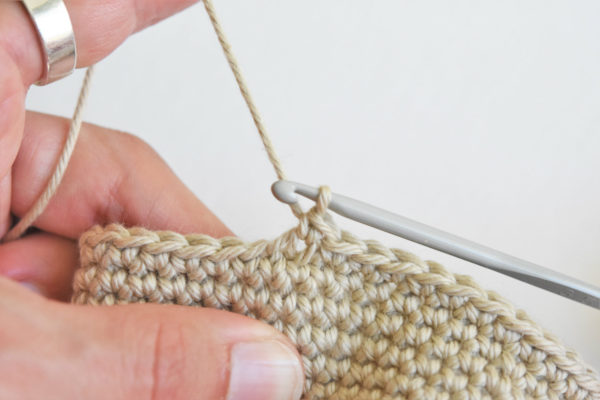
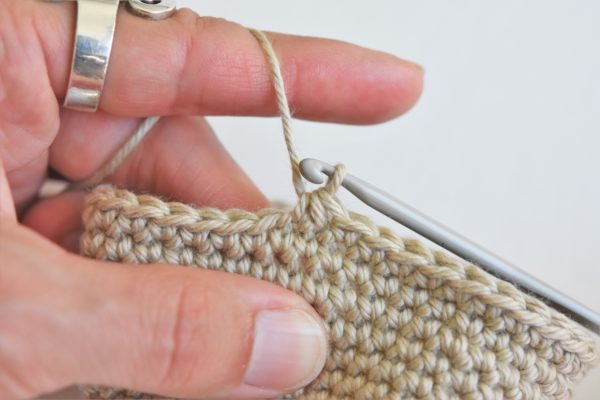
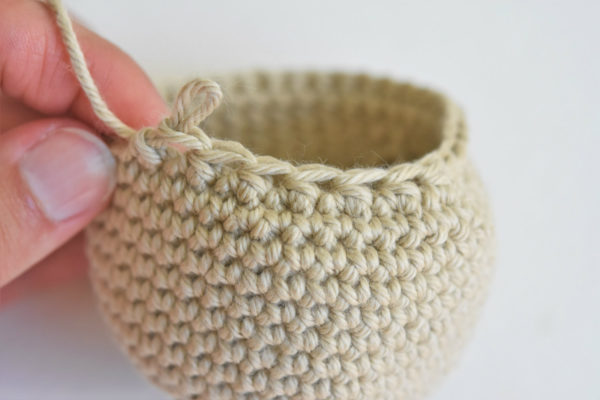
When using this method the decrease will look much more like the usual single crochet stitch. The surface will be smoother and your finished toy will simply look better.
I am fairly new to crochet b
and especially to amigurumi. I noticed these comments about work being inside out but cannot find a thread which discusses it further. My question is whether that pertains to me because I always end up trying to work tiny little pieces from the inside ( like when stitching a small arm, for example) and I wonder if I am supposed to end up stitching around from the outside instead.
I crochet left handed. I hope that is a clear question. Any instruction appreciated. Thanks in advance.
Hi!
Yes, you are supposed to be stitching from the outside. I don`t think right or left handed makes a difference here. Let`s say you have started a piece and have finished the first round (6 sc in a magic ring). The side that`s in front you when working is the right side.Keep it outside.
Unfortunately I haven`t written a topic about that, but I´ll sure add this to my themes list for the future.
So excited the book is coming out soon in English!
I just started amigurumi with making your “funny bunny”. It wasn’t until I read the above comment about work being inside out I’m concerned that mine work is inside out. How can I avoid this and correct what I’ve done so far.
You know, it`s actually very simple. It depends on how you hold the piece when starting it. After the increase rounds there usually come straight rounds and the piece forms something that reminds a bowl. This is the moment when you need to choose which way you hold the piece. You can turn it either this way or that way.
If you have already finished the piece, stuffed it and sewn together, then there`s no good way to fix it.
THANK YOU. I’m new to amigurumi (your Tiny Luck Elephant was my first one ever). I just learned that my work is “inside out”, and now that I’ve corrected that I can fix my “decrease scars”. Super happy :) Can’t wait for your book!
Thanks for this tip.
Can I find your book in English?
It`s coming in spring 2016 :)