Click Here to Subscribe and receive a Free Bonus Pattern


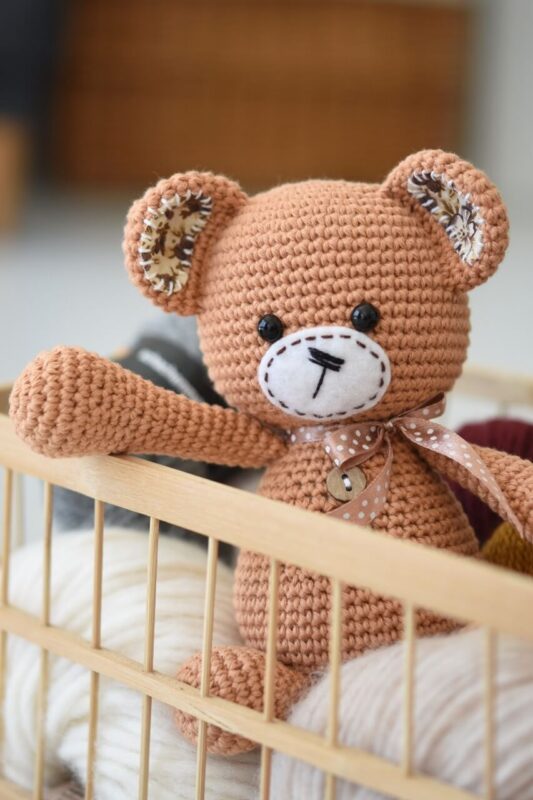
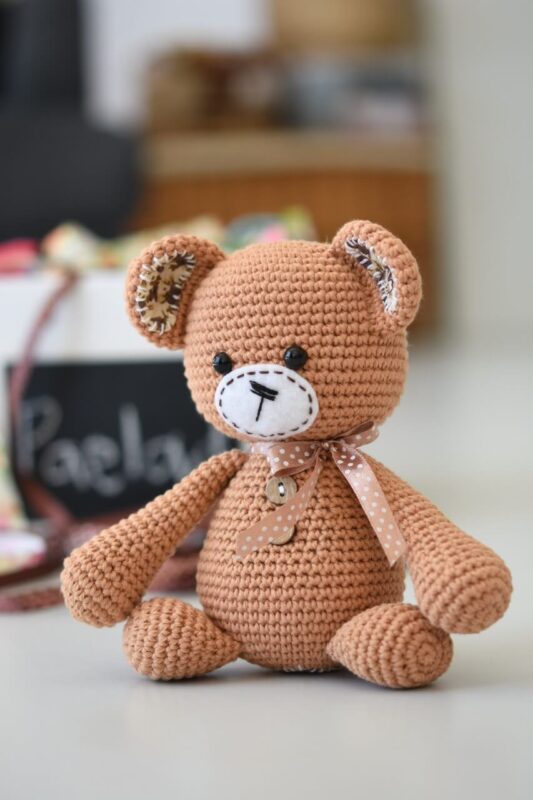
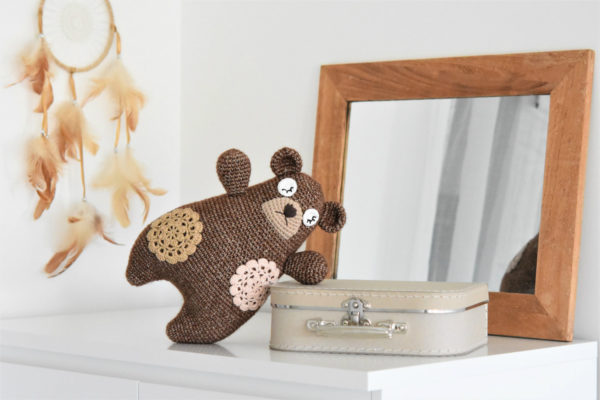
SMUGLY BEAR – Easy Amigurumi Bear Pattern
Free Crochet Pattern by lilleliis
This free easy amigurumi bear pattern is perfect for beginners. If you’re looking for a simple first amigurumi project, this crochet bear is a wonderful place to start.
Here are a few reasons why Smugly Bear makes an ideal beginner amigurumi pattern:
- You only need one basic stitch – single crochet (see the tutorial: How to single crochet).
- There are no color changes involved, making the project easier and more relaxing to crochet. The entire bear is made in one color.
- The bear is a beginner-friendly size – not too big and not too small – making it comfortable and enjoyable to crochet.
- With his lumpy body and smug little face, this crochet bear is simply too cute to resist!
CHOOSE PATTERN LANGUAGE
Supplies you`ll need:
- Yarn: brown or beige DK / 8 ply weight cotton. For example 2 skeins of Rico Design Ricorumi DK: 25 g / 57.5 m
- Crochet hook 2.5 mm
- Stitch marker
- Polyester fiberfill
- Black safety eyes (Ø 8 mm)
- Cotton fabric
- Piece of felt for the muzzle
- Embroidery thread
- Buttons (2)
- Satin ribbon around the neck
- Darning and embroidery needle
Finished size: 17 cm / 6.7 in
Skill level: easy
Stitches needed (US crochet terms):
Slip stitch (sl st), chain (ch), single crochet (sc)
Abbreviations:
Repeat (rep), stitch(es) – st(s)
About the pattern:
- Work in continuous rounds.
- Use a stitch marker and place it in the first stitch of the round to mark the beginning of it.
- Leave each piece a long tail for sewing.
HEAD
1: Start 6 sc in a magic ring [6]
2: Work 2 sc in each st around [12]
3: (Sc in next st, 2 sc in next st) rep 6 times [18]
4: (Sc in next 2 sts, 2 sc in next st) rep 6 times [24]
5: (Sc in next 3 sts, 2 sc in next st) rep 6 times [30]
6: (Sc in next 4 sts, 2 sc in next st) rep 6 times [36]
7: (Sc in next 5 sts, 2 sc in next st) rep 6 times [42]
8: (Sc in next 6 sts, 2 sc in next st) rep 6 times [48]
9: (Sc in next 7 sts, 2 sc in next st) rep 6 times [54]
10-20: Sc in each st around
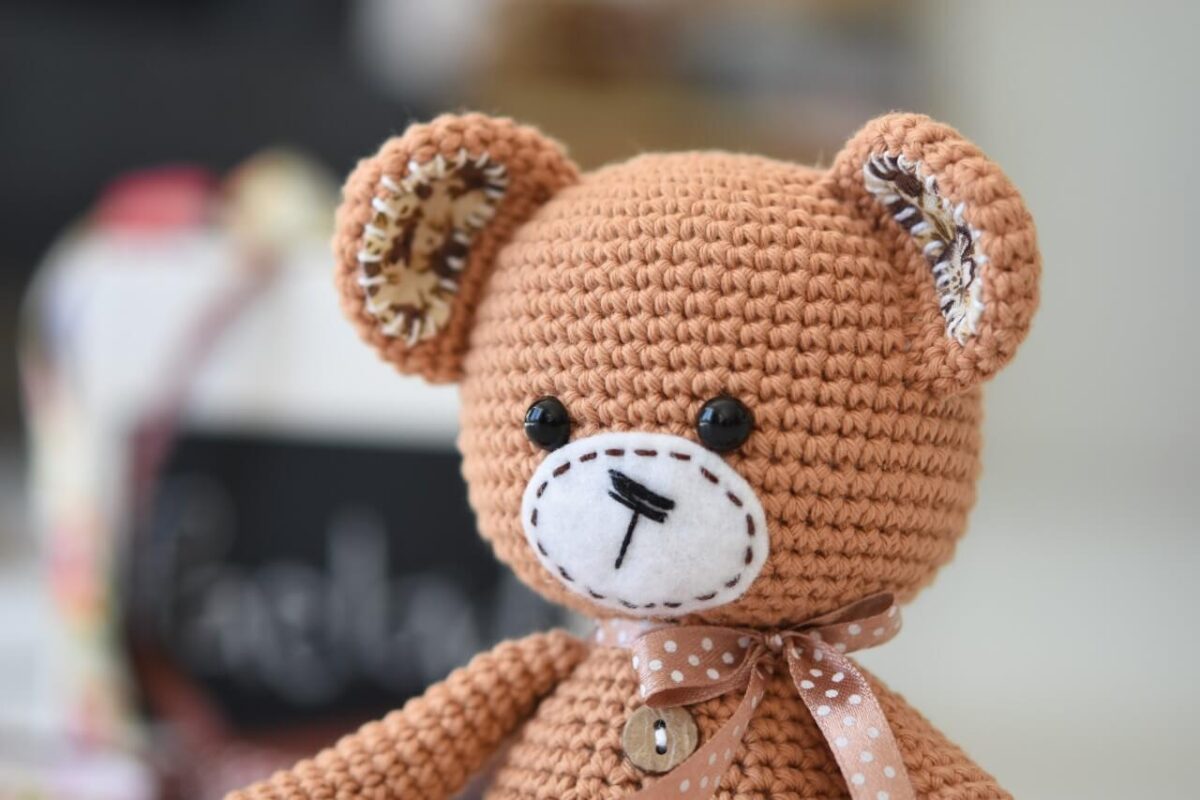
Fasten the safety eyes between rounds 16 and 17 with an interspace of 5 stitches. Close the washers on the inside of the piece.
21: (Sc in next 7 sts, sc2tog) rep 6 times [48]
22: (Sc in next 6 sts, sc2tog) rep 6 times [42]
23: (Sc in next 5 sts, sc2tog) rep 6 times [36]
24: (Sc in next 4 sts, sc2tog) rep 6 times [30]
25: (Sc in next 3 sts, sc2tog) rep 6 times [24]
Stuff the head.
MUZZLE
Cut an oval piece of white felt for the muzzle. Sew it onto the head and embroider the nose.
EAR (make 2)
1: Start 6 sc in a magic ring [6]
2: Work 2 sc in each st around [12]
3: (Sc in next st, 2 sc in next st) rep 6 times [18]
4: (Sc in next 2 sts, 2 sc in next st) rep 6 times [24]
5-8: Sc in each st around
9: (Sc in next 6 sts, sc2tog) rep 3 times [21]
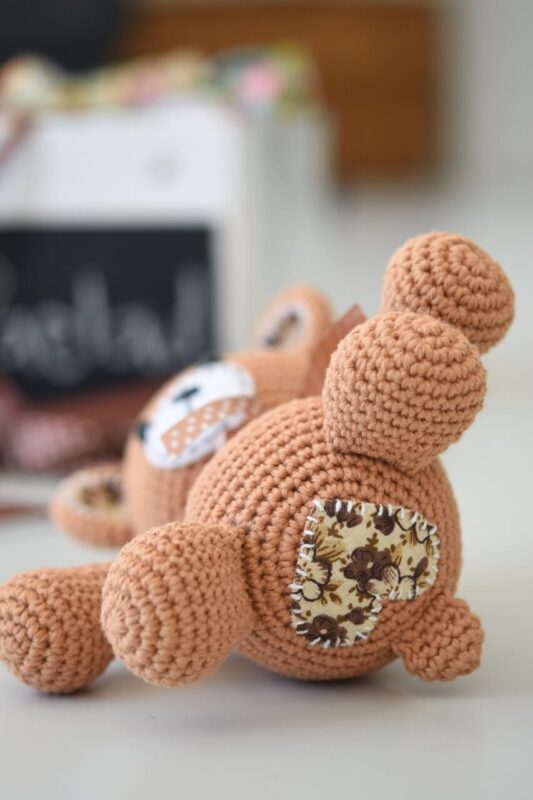
Cut two patches of fabric following the shape of the ears. Sew the patches on the ears, and the ears slightly curved to the head.
BODY
1: Start 6 sc in a magic ring [6]
2: Work 2 sc in each st around [12]
3: (Sc in next st, 2 sc in next st) rep 6 times [18]
4: (Sc in next 2 sts, 2 sc in next st) rep 6 times [24]
5: (Sc in next 3 sts, 2 sc in next st) rep 6 times [30]
6: (Sc in next 4 sts, 2 sc in next st) rep 6 times [36]
7: (Sc in next 5 sts, 2 sc in next st) rep 6 times [42]
8: (Sc in next 6 sts, 2 sc in next st) rep 6 times [48]
9: (Sc in next 7 sts, 2 sc in next st) rep 6 times [54]
10-15: Sc in each st around
16: (Sc in next 7 sts, sc2tog) rep 6 times [48]
17: Sc in each st around
18: (Sc in next 6 sts, sc2tog) rep 6 times [42]
19: Sc in each st around
20: (Sc in next 5 sts, sc2tog) rep 6 times [36]
21-22: Sc in each st around
Stuff the body, and keep adding stuffing.
23: (Sc in next 4 sts, sc2tog) rep 6 times [30]
24-25: Sc in each st around
26: (Sc in next 3 sts, sc2tog) rep 6 times [24]
Sew the head to the body.
LEG (make 2)
1: Start 6 sc in a magic ring [6]
2: Work 2 sc in each st around [12]
3: (Sc in next st, 2 sc in next st) rep 6 times [18]
4: (Sc in next 2 sts, 2 sc in next st) rep 6 times [24]
5-7: Sc in each st around
8: (Sc in next 10 sts, sc2tog) rep 2 times [22]
9: (Sc in next 9 sts, sc2tog) rep 2 times [20]
10: (Sc in next 8 sts, sc2tog) rep 2 times [18]
11: (Sc in next 7 sts, sc2tog) rep 2 times [16]
12: (Sc in next 6 sts, sc2tog) rep 2 times [14]
Stuff the legs softly and flatten with fingers. Sew the legs to the body skipping about 7 rounds from the bottom.
TAIL
1: Start 6 sc in a magic ring [6]
2: Work 2 sc in each st around [12]
3-4: Sc in each st around
5: (Sc in next 2 sts, sc2tog) rep 3 times [9]
Flatten the tail and sew to the back of the body.
ARM (make 2)
1: Start 6 sc in a magic ring [6]
2: Work 2 sc in each st around [12]
3: (Sc in next st, 2 sc in next st) rep 6 times [18]
4: (Sc in next 2 sts, 2 sc in next st) rep 6 times [24]
5-6: Sc in each st around
7: (Sc in next 2 sts, sc2tog) rep 6 times [18]
8: Sc in each st around
9: (Sc in next 7 sts, sc2tog) rep 2 times [16]
10: (Sc in next 6 sts, sc2tog) rep 2 times [14]
Stuff the arm and flatten with fingers. Keep adding stuffing until round 17.
11-12: Sc in each st around
13: Sc in next 6 sts, sc2tog, sc in next 6 sts [13]
14-15: Sc in each st around
16: Sc in next 11 sts, sc2tog [12]
17-18: Sc in each st around
19: Sc in next 5 sts, sc2tog, sc in next 5 sts [11]
20-21: Sc in each st around
22: Sc in next 9 sts, sc2tog [10]
23: Sc in each st around
24: Sc in next 2 sts, sl st in the next st, cut the yarn and pull the tail out of the next st (the remaining stitches are left unworked)
Sew the arms high on the body.
Embellish the butt with a heart shape cut out of cotton fabric. Sew the buttons on his tummy and tie a ribbon around his neck.
Szükséges hozzávalók:
- Fonal: barna vagy bézs DK / 8 ply pamut fonal. Például 2 gombolyag Rico Design Ricorumi DK: 25 g / 57.5 m
- 2.5 mm-es horgolótű
- Szemjelölő
- Poliészter tömőanyag
- Fekete biztonsági szemek (Ø 8 mm)
- Pamut anyag
- Egy kis darab filc a pofijának
- Hímzőfonal
- Gombok (2)
- Szatén szalag a nyaka köré
- Stoppoló- és hímzőtű
Méret: 17 cm
Szint: könnyű
Öltések:
Hamispálca / kúszószem (hp), láncszem (lsz), rövidpálca (rp)
Rövidítések:
Ismételd (ism), következő (köv.)
A mintáról:
- Folyamatos körökben dolgozz.
- Tegyél szemjelölőt a kör első szemébe, ezzel jelöld a kör kezdetét.
- Minden darabnál hagyd hosszan a fonalat a varráshoz.
FEJ
1: 6 rp a varázsgyűrűbe [6]
2: 2 rp minden szembe [12]
3: (Rp a köv. szembe, 2 rp a köv. szembe) ism 6-szor [18]
4: (Rp a köv. 2 szembe, 2 rp a köv. szembe) ism 6-szor [24]
5: (Rp a köv. 3 szembe, 2 rp a köv. szembe) ism 6-szor [30]
6: (Rp a köv. 4 szembe, 2 rp a köv. szembe) ism 6-szor [36]
7: (Rp a köv. 5 szembe, 2 rp a köv. szembe) ism 6-szor [42]
8: (Rp a köv. 6 szembe, 2 rp a köv. szembe) ism 6-szor [48]
9: (Rp a köv. 7 szembe, 2 rp a köv. szembe) ism 6-szor [54]
10-20: Rp minden szembe
Helyezd a biztonsági szemeket a 16. és 17. körök közé, egymástól 5 szem távolságra. Zárd le a biztonsági szemet belülről.
21: (Rp a köv. 7 szembe, fogy) ism 6-szor [48]
22: (Rp a köv. 6 szembe, fogy) ism 6-szor [42]
23: (Rp a köv. 5 szembe, fogy) ism 6-szor [36]
24: (Rp a köv. 4 szembe, fogy) ism 6-szor [30]
25: (Rp a köv. 3 szembe, fogy) ism 6-szor [24]
Tömd ki a fejet.
POFI
Vágj ki fehér filcből egy oválist. Varrd a fejre, hímezd rá az orrát.
FÜLEK (készíts 2-t)
1: 6 rp a varázsgyűrűbe [6]
2: 2 rp minden szembe [12]
3: (Rp a köv. szembe, 2 rp a köv. szembe) ism 6-szor [18]
4: (Rp a köv. 2 szembe, 2 rp a köv. szembe) ism 6-szor [24]
5-8: Rp minden szembe
9: (Rp a köv. 6 szembe, fogy) ism 3-szor [21]
Vágj ki két darabot textilből, követve a fül alakját. Varrd a darabokat a fülekre, majd varrd a füleket enyhe ívben a fejre.
TEST
1: 6 rp a varázsgyűrűbe [6]
2: 2 rp minden szembe [12]
3: (Rp a köv. szembe, 2 rp a köv. szembe) ism 6-szor [18]
4: (Rp a köv. 2 szembe, 2 rp a köv. szembe) ism 6-szor [24]
5: (Rp a köv. 3 szembe, 2 rp a köv. szembe) ism 6-szor [30]
6: (Rp a köv. 4 szembe, 2 rp a köv. szembe) ism 6-szor [36]
7: (Rp a köv. 5 szembe, 2 rp a köv. szembe) ism 6-szor [42]
8: (Rp a köv. 6 szembe, 2 rp a köv. szembe) ism 6-szor [48]
9: (Rp a köv. 7 szembe, 2 rp a köv. szembe) ism 6-szor [54]
10-15: Rp minden szembe
16: (Rp a köv. 7 szembe, fogy) ism 6-szor [48]
17: Rp minden szembe
18: (Rp a köv. 6 szembe, fogy) ism 6-szor [42]
19: Rp minden szembe
20: (Rp a köv. 5 szembe, fogy) ism 6-szor [36]
21-22: Rp minden szembe
Tömd ki a testet. A munka során folyamatosan tömd tovább.
23: (Rp a köv. 4 szembe, fogy) ism 6-szor [30]
24-25: Rp minden szembe
26: (Rp a köv. 3 szembe, fogy) ism 6-szor [24]
Varrd a fejet a testre.
LÁB (készíts 2-t)
1: 6 rp a varázsgyűrűbe [6]
2: 2 rp minden szembe [12]
3: (Rp a köv. szembe, 2 rp a köv. szembe) ism 6-szor [18]
4: (Rp a köv. 2 szembe, 2 rp a köv. szembe) ism 6-szor [24]
5-7: Rp minden szembe
8: (Rp a köv. 10 szembe, fogy) ism 2-szer [22]
9: (Rp a köv. 9 szembe, fogy) ism 2-szer [20]
10: (Rp a köv. 8 szembe, fogy) ism 2-szer [18]
11: (Rp a köv. 7 szembe, fogy) ism 2-szer [16]
12: (Rp a köv. 6 szembe, fogy) ism 2-szer [14]
Enyhén tömd ki a lábat, lapítgasd ki. Varrd a lábakat a testre, az aljától számított 7. körre.
FAROK
1: 6 rp a varázsgyűrűbe [6]
2: 2 rp minden szembe [12]
3-4: Rp minden szembe
5: (Rp a köv. 2 szembe, fogy) ism 3-szor [9]
Lapítsd ki a farkát, varrd a test hátoldalára.
KAR (készíts 2-t)
1: 6 rp a varázsgyűrűbe [6]
2: 2 rp minden szembe [12]
3: (Rp a köv. szembe, 2 rp a köv. szembe) ism 6-szor [18]
4: (Rp a köv. 2 szembe, 2 rp a köv. szembe) ism 6-szor [24]
5-6: Rp minden szembe
7: (Rp a köv. 2 szembe, fogy) ism 6-szor [18]
8: Rp minden szembe
9: (Rp a köv. 7 szembe, fogy) ism 2-szer [16]
10: (Rp a köv. 6 szembe, fogy) ism 2-szer [14]
Tömd ki a kart és lapítsd ki. A 17. körig tömd ki.
11-12: Rp minden szembe
13: Rp a köv. 6 szembe, fogy, rp a köv. 6 szembe [13]
14-15: Rp minden szembe
16: Rp a köv. 11 szembe, fogy [12]
17-18: Rp minden szembe
19: Rp a köv. 5 szembe, fogy, rp a köv. 5 szembe [11]
20-21: Rp minden szembe
22: Rp a köv. 9 szembe, fogy [10]
23: Rp minden szembe
24: Rp a köv. 2 szembe, hp a köv. szembe, vágd el a fonalat és húzd át a végét a következő szemeb (a megmaradt szemek feldolgozatlanul maradnak).
Varrd fel a karokat a testre.
Díszítsd a hátsóját egy pamutanyagból kivágott szív formával. Varrj fel gombokat a pocakjára és köss szalagot a nyaka köré.
Want to keep this pattern for later?
You can download the PDF version with helpful step-by-step photos.
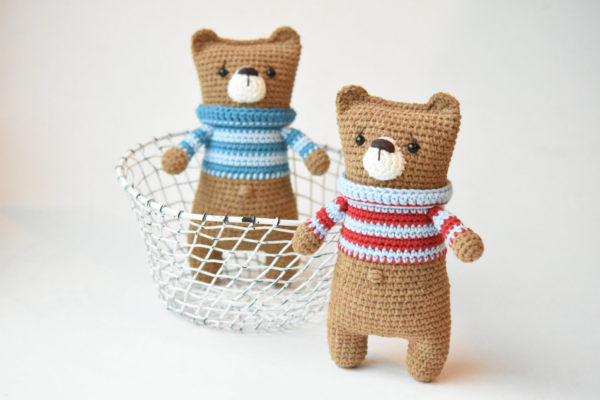
CAN`T GET ENOUGHT OF CUTE BEARS?
This product has multiple variants. The options may be chosen on the product page
This product has multiple variants. The options may be chosen on the product page

This product has multiple variants. The options may be chosen on the product page
This product has multiple variants. The options may be chosen on the product page

Hi, I'm Mari-Liis
The designer behind lilleliis crochet patterns.
I love creating amigurumi toys and spreading the joy of crochet.
Most Loved Free Crochet Patterns
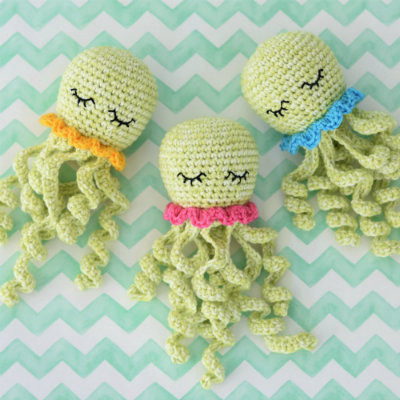
Amigurumi Octopus

Amigurumi Heart
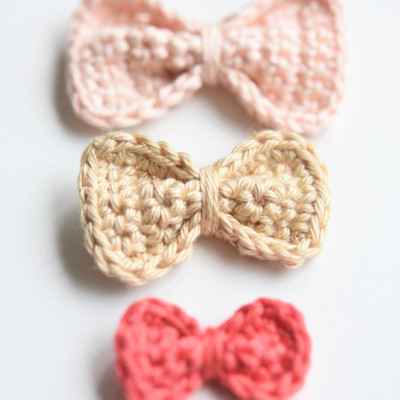
Crochet Bow in 3 Sizes