Click Here to Subscribe and receive a Free Bonus Pattern


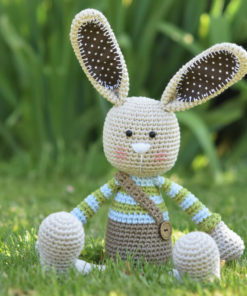 Long ear bunny crochet pattern - Long-ear Rabbit
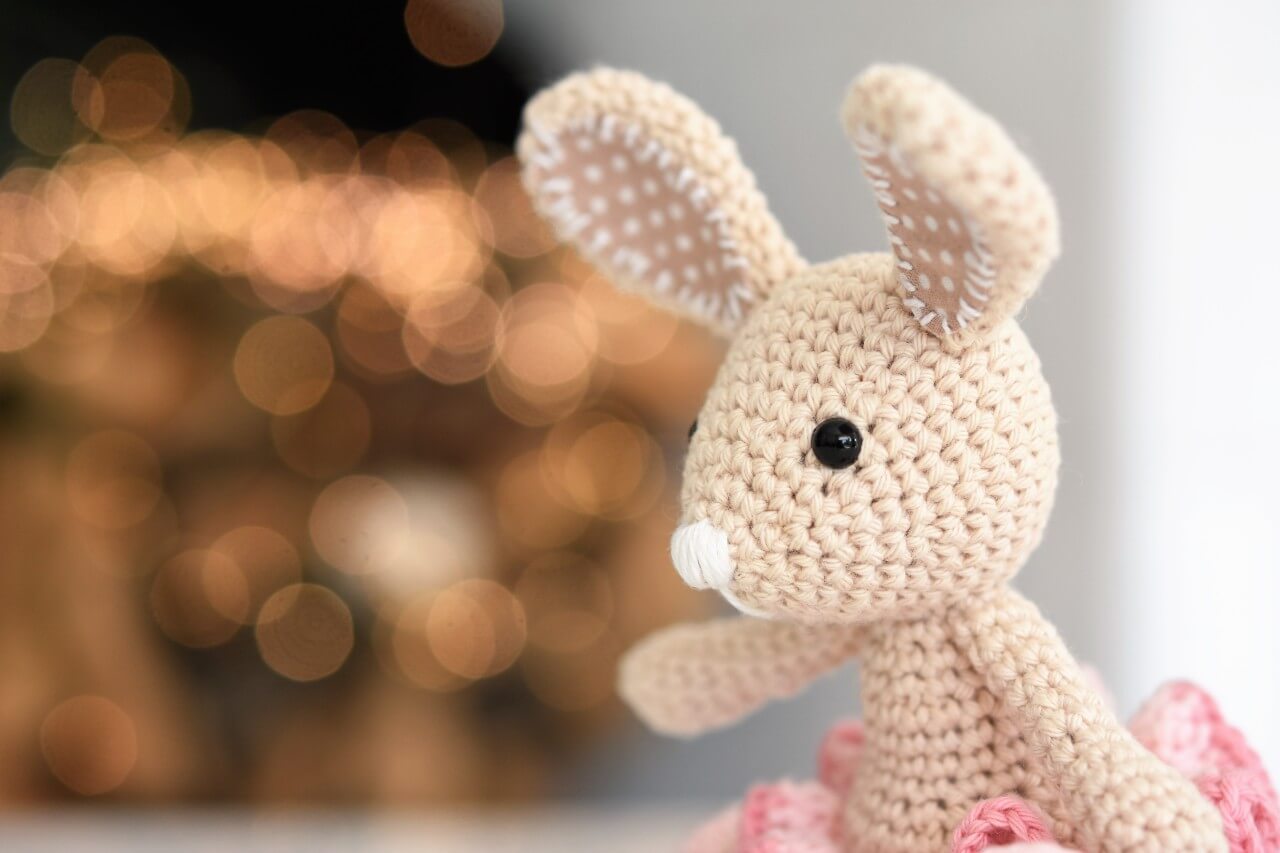
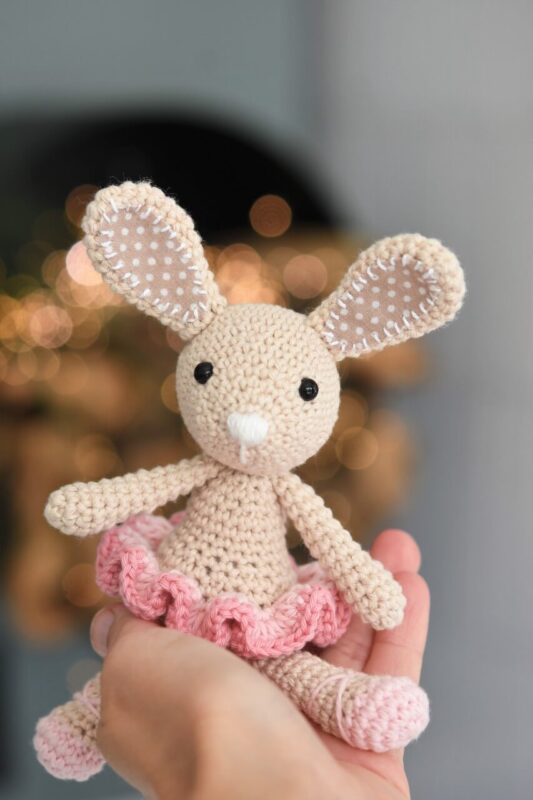
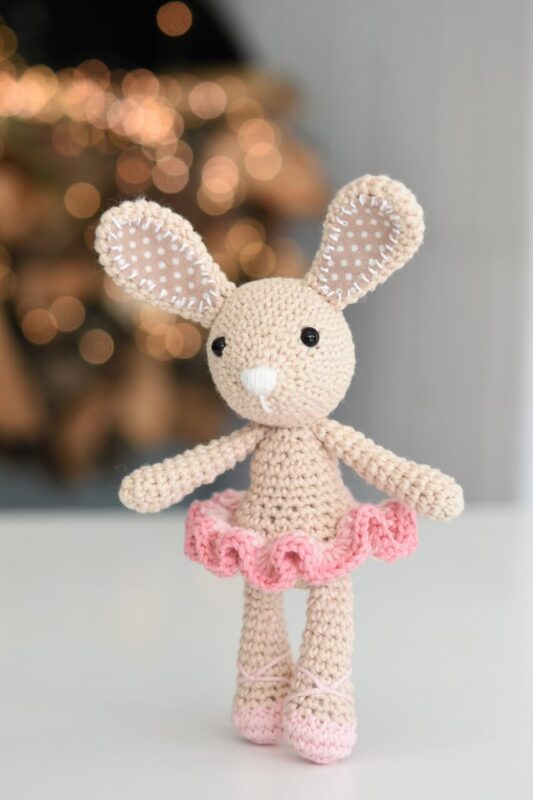
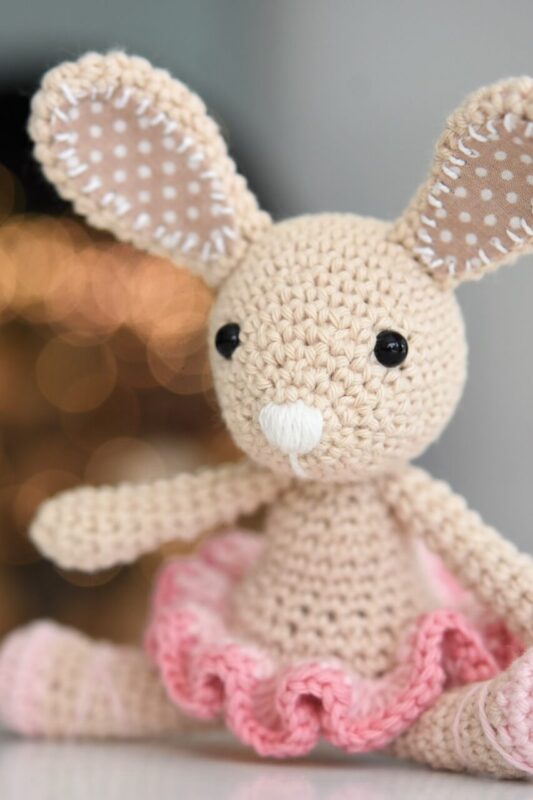
AMIGURUMI BALLERINA BUNNY
Free Amigurumi Pattern by lilleliis
Amigurumi ballerina bunny is designed for little girls who adore everything pink and girly. Who could resist her ruffled tutu skirt and tiny ballet slippers?
For an extra charming and sophisticated touch, you can cover the ears with fabric.
Made with pure cotton yarn, this ballerina bunny doll measures approximately 18 cm / 7 inches tall.
CHOOSE PATTERN LANGUAGE
Supplies you`ll need:
- Yarn: DK / 8 ply weight cotton in 4 colors – beige, white, and two shades of pink. For example Rico Design Ricorumi DK: 25 g / 57.5 m
- Crochet hook 2.5 mm
- Stitch marker
- Polyester fiberfill
- Black safety eyes (Ø 6 mm)
- Cotton fabric
- Embroidery thread
- Darning and embroidery needle
Finished size: 18 cm / 7 in
Skill level: easy+
Stitches and abbreviations (US crochet terms):
Slip stitch (sl st), chain (ch), single crochet (sc), half double crochet (hdc), repeat (rep), stitch(es) – st(s)
About the pattern:
- Work in continuous rounds.
- Use a stitch marker and place it in the first stitch of the round to mark the beginning of it.
- Leave each piece a long tail for sewing.
HEAD
1: Beige yarn. Start 6 sc in a magic ring [6]
2: Work 2 sc in each st [12]
3: (Sc in next st, 2 sc in next st) rep 6 times [18]
4: (Sc in next 2 sts, 2 sc in next st) rep 6 times [24]
5: (Sc in next 3 sts, 2 sc in next st) rep 6 times [30]
6: (Sc in next 4 sts, 2 sc in next st) rep 6 times [36]
7-9: Sc in each st around
10: (Sc in next 4 sts, sc2tog) rep 6 times [30]
11: Sc in each st around
12: (Sc in next 3 sts, sc2tog) rep 6 times [24]
13-14: Sc in each st around
15: (Sc in next 2 sts, sc2tog) rep 6 times [18]
16: Sc in each st around
Fasten the safety eyes between rounds 13 and 14, with an interspace of 9 stitches.
Begin stuffing the head.
17: (Sc in next st, sc2tog) rep 6 times [12]
18: (Sc in next 2 sts, sc2tog) rep 3 times [9]
19: (Sc in next st, sc2tog) rep 3 times [6]
Weave the yarn through the front loops of all 6 sts of the last round, and pull tightly. Make a knot and hide the yarntail.
Embroider the nose with white yarn.
EAR (make 2)
1: Beige yarn. Start 6 sc in a magic ring [6]
2: Work 2 sc in each st [12]
3: Sc in each st around
4: (Sc in next 3 sts, 2 sc in next st) rep 3 times [15]
5-7: Sc in each st around
8: Sc in next 13 sts, sc2tog [14]
9: Sc in next 6 sts, sc2tog, sc in next 6 sts [13]
10: Sc in next 11 sts, sc2tog [12]
11: Sc in next 5 sts, sc2tog, sc in next 5 sts [11]
12: Sc in next 9 sts, sc2tog [10]
13: Sc in next 4 sts, sc2tog, sc in next 4 sts [9]
14: Sc in next 7 sts, sc2tog [8]
Sew fabric patches on the ears. Then sew the ears on the head.
BODY
1: Beige yarn. Start 6 sc in a magic ring [6]
2: Work 2 sc in each st [12]
3: (Sc in next st, 2 sc in next st) rep 6 times [18]
4: (Sc in next 2 sts, 2 sc in next st) rep 6 times [24]
5: (Sc in next 3 sts, 2 sc in next st) rep 6 times [30]
6-7: Sc in each st around
8: Working in the back loops only, sc in each st around
9: (Sc in next 3 sts, sc2tog) rep 6 times [24]
10: (Sc in next 2 sts, sc2tog) rep 6 times [18]
Begin stuffing the body.
11-14: Sc in each st around
15: (Sc in next 4 sts, sc2tog) rep 3 times [15]
16: Sc in each st around
17: (Sc in next 3 sts, sc2tog) rep 3 times [12]
SKIRT
Crochet in the leftover front loops of round 8 on the body. Hold the body upside down.
1: Light pink. Pull the yarn through the first front loop, ch 1 (does not count as a stitch). Starting in the same stitch: work 2 sc in each stitch around, sl st in the first sc [60]
2: Ch 2. Starting in the same stitch: work 2 hdc in each st around, sl st in the first hdc [120]
3: Dark pink. Ch 1. Starting in the same stitch: work sc in each st around, sl st in the first sc [120]
Weave in ends.
Sew the head together with the body.
FOOT (make 2)
1: Light pink. Start 6 sc in a magic ring [6]
2: Work 2 sc in each st [12]
3: (Sc in next st, 2 sc in next st) rep 6 times [18]
4: Sc in each st around
Change to beige yarn for the next round, however, leave a long tail of shoe color hanging out of the work to make shoe straps later.
5: Beige. Sc in next 3 sts, (sc2tog) rep 6 times, sc in next 3 sts [12]
6-8: Sc in each st around
Fill the tip of the leg, keep stuffing.
9: Sc in next 5 sts, sc2tog, sc in next 5 sts [11]
10: Sc in each st around
11: Sc in next 9 sts, sc2tog [10]
12: Sc in each st around
13: Sc in next 4 sts, sc2tog, sc in next 4 sts [9]
14: Sc in each st around
15: Sc in next 7 sts, sc2tog [8]
16: Sc in each st around
17: Sc in next st (leave the remaining stitches unworked)
Flatten the leg and sew closed with a couple of stitches (VIDEO TUTORIAL – How to sew an amigurumi piece closed)
Make straps for the shoes with pink yarn. Wrap it around the leg so that it crosses on the front.
Sew the legs to the body.
ARM (make 2)
1: Beige yarn. Start 6 sc in a magic ring [6]
2: (Sc in next st, 2 sc in next st) rep 3 times [9]
3-5: Sc in each st around
6: Sc in next 7 sts, sc2tog [8]
7-9: Sc in each st around
Stuff only the tip of the arm.
10: Sc in next 3 sts, sc2tog, sc in next 3 sts [7]
11-12: Sc in each st around
13: Sc in next 5 sts, sc2tog [6]
14: Sc in each st around
Flatten the arm and sew closed with a couple of stitches.
Sew the arms between the head and the body.
Hozzávalók, melyekre szükséged lehet
- Fonal: DK / 8 ply pamut 4 színben – bézs, fehér és a rózsaszín két árnyalata. Például Rico Design Ricorumi DK: 25 g / 57.5 m
- 5 mm-es horgolótű
- Szemjelölő
- Poliészter tömőanyag
- Fekete biztonsági szemek (Ø 6 mm)
- Pamut textildarab
- Hímzőcérna
- Stoppoló és hímzőtű
Méret: 18 cm
Szint: könnyű+
Öltések és rövidítések:
Hamispálca / kúszószem (hp)
láncszem (lsz)
rövidpálca (rp)
félpálca (fp)
ismételd (ism)
A mintáról:
- Folyamatos körökben horgolj.
- Használj szemjelölőt, helyezd a kör kezdetén az első szembe.
- Hagyd hosszan minden darab végén a fonalat a varráshoz.
FEJ
1: Bézs fonallal. Kezdd 6 rp-val a varázskörbe [6]
2: Minden szembe 2 rp [12]
3: (Rp a köv. szembe, 2 rp a köv. szembe) ism 6-szor [18]
4: (Rp a köv. 2 szembe, 2 rp a köv. szembe) ism 6-szor [24]
5: (Rp a köv. 3 szembe, 2 rp a köv. szembe) ism 6-szor [30]
6: (Rp a köv. 4 szembe, 2 rp a köv. szembe) ism 6-szor [36]
7-9: Rp minden szembe
10: (Rp a köv. 4 szembe, fogy) ism 6-szor [30]
11: Rp minden szembe
12: (Rp a köv. 3 szembe, fogy) ism 6-szor [24]
13-14: Rp minden szembe
15: (Rp a köv. 2 szembe, fogy) ism 6-szor [18]
16: Rp minden szembe
Rögzítsd a biztonsági szemeket a 13. és 14. körök közé, egymástól 7 szem távolságra.
Kezdd el a fej kitömését.
17: (Rp a köv. szembe, fogy) ism 6-szor [12]
18: (Rp a köv. 2 szembe, fogy) ism 3-szor [9]
19: (Rp a köv. szembe, fogy) ism 3-szor [6]
Fűzd a fonalat az utolsó kör 6 szemének külső hurkába és húzd össze. Csomózd meg és rejtsd el a fonalvéget.
Hímezd ki az orrát fehér fonallal.
FÜL (készíts kettőt)
1: Bézs fonallal. Kezdd 6 rp-val a varázskörbe [6]
2: Minden szembe 2 rp [12]
3: Rp minden szembe
4: (Rp a köv. 3 szembe, 2 rp a köv. szembe) ism 3-szor [15]
5-7: Rp minden szembe
8: Rp a köv. 13 szembe, fogy [14]
9: Rp a köv. 6 szembe, fogy, rp a köv. 6 szembe [13]
10: Rp a köv. 11 szembe, fogy [12]
11: Rp a köv. 5 szembe, fogy, rp a köv. 5 szembe [11]
12: Rp a köv. 9 szembe, fogy [10]
13: Rp a köv. 4 szembe, fogy, rp a köv. 4 szembe [9]
14: Rp a köv. 7 szembe, fogy [8]
Varrj egy textildarabot a fülekre. Varrd a füleket a fejre.
TEST
1: Bézs fonallal. Kezdd 6 rp-val a varázsgyűrűbe [6]
2: Minden szembe 2 rp [12]
3: (Rp a köv. szembe, 2 rp a köv. szembe) ism 6-szor [18]
4: (Rp a köv. 2 szembe, 2 rp a köv. szembe) ism 6-szor [24]
5: (Rp a köv. 3 szembe, 2 rp a köv. szembe) ism 6-szor [30]
6-7: Rp minden szembe
8: Csak hátsó szálba öltéssel dolgozz, rp minden szembe
9: (Rp a köv. 3 szembe, fogy) ism 6-szor [24]
10: (Rp a köv. 2 szembe, fogy) ism 6-szor [18]
Kezdd el a test tömését.
11-14: Rp minden szembe
15: (Rp a köv. 4 szembe, fogy) ism 3-szor [15]
16: Rp minden szembe
17: (Rp a köv. 3 szembe, fogy) ism 3-szor [12]
SZOKNYA
Horgold a test 8. körének első hurkaiba. Tartsd a testet fejjel lefelé.
1: Világos rózsaszínnel. Húzd a fonalat az első hurkon át, 1 lsz (nem számít a szemszámba). Kezdd ugyanabba a hurokba öltve: 2 rp minden szembe, hp az első szembe [60]
2: 2 lsz. Kezdd ugyanabba a szembe öltve: 2 fp minden szembe, hp az első fp-ba öltve [120]
3: Sötét rózsaszínnel. 1 lsz. Kezdd ugyanabba a szembe öltve: rp minden szembe, hp az első rp-ba [120]
Dolgozd el a végeit.
Varrd össze a fejet a testtel.
LÁB (készíts kettőt)
1: Világos rózsaszín. Kezdd 6 rp-val a varázsgyűrűbe [6]
2: Minden szembe 2 rp [12]
3: (Rp a köv. szembe, 2 rp a köv. szembe) ism 6-szor [18]
4: Rp minden szembe
Váltsd a színt bézsre a következő körben, de hagyd hosszan a fonalat, amellyel a cipőt készítetted, kilógva a munkából, később ezzel készítsd el a cipőfűzőt.
5: Bézs. Rp a köv. 3 szembe, (fogy) ism 6-szor, rp a köv. 3 szembe [12]
6-8: Rp minden szembe
Tömd ki a láb hegyét, majd tömd folyamatosan.
9: Rp a köv. 5 szembe, fogy, rp a köv. 5 szembe [11]
10: Rp minden szembe
11: Rp a köv. 9 szembe, fogy [10]
12: Rp minden szembe
13: Rp a köv. 4 szembe, fogy, rp a köv. 4 szembe [9]
14: Rp minden szembe
15: Rp a köv. 7 szembe, fogy [8]
16: Rp minden szembe
17: Rp a köv. szembe (a többit hagyd feldolgozatlanul)
Lapítsd ki a lábat és varrd össze néhány öltéssel (VIDEÓ ÚTMUTATÓ – ezen a címmel: – How to sew an amigurumi piece closed (hogyan varrd össze az amigurumi darabodat).
Készítsd el rózsaszín fonallal a cipő pántjait. Tekerd a láb köré úgy, hogy keresztezze egymást elől.
Varrd a lábakat a testhez.
KAR (készíts kettőt)
1: Bézs fonallal. Kezdd 6 rp-val a varázskörbe öltve [6]
2: (Rp a köv. szembe, 2 rp a köv. szembe) ism 3-szor [9]
3-5: Rp minden szembe
6: Rp a köv. 7 szembe, fogy [8]
7-9: Rp minden szembe
Csak a kar csúcsát tömd ki.
10: Rp a köv. 3 szembe, fogy, rp a köv. 3 szembe [7]
11-12: Rp minden szembe
13: Rp a köv. 5 szembe, fogy [6]
14: Rp minden szembe
Lapítsd ki a kart, varrd össze néhány öltéssel.
Varrd a karokat a fej és a test közé.
Want to keep this sweet Ballerina Bunny pattern for later?
You can download the PDF version with helpful step-by-step photos.
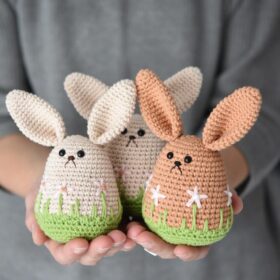
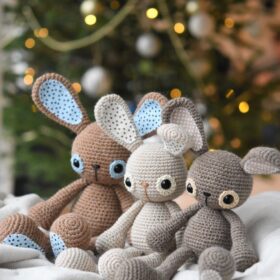
BROWSE MORE BUNNY PATTERNS
This product has multiple variants. The options may be chosen on the product page
This product has multiple variants. The options may be chosen on the product page
This product has multiple variants. The options may be chosen on the product page
This product has multiple variants. The options may be chosen on the product page
Hi, I'm Mari-Liis
The designer behind lilleliis crochet patterns.
I love creating amigurumi toys and spreading the joy of crochet.
Most Loved Free Crochet Patterns
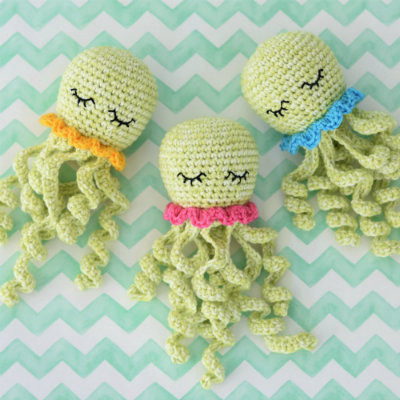
Amigurumi Octopus

Amigurumi Heart
Crochet Bow in 3 Sizes