

Amigurumi animals, Bear, New patterns
2nd Advent – Christmas teddy + elf hat pattern
Hi again!
So, you already noticed I am late with my post, because I promised to share it on every Advent. I appologise for that. Actually I wanted to show you something else I`ve made, but since I couldn`t manage to take photos of it, I decided to change the plans. We are having this awful dark period of the year. We only have about 6 hours of daylight in a day and only 2 hours when you can actually take photos inside the room. I finished my project which was meant for the 2nd Advent on Friday, so I was just on time, but… Since I was away from home on Saturday and Sunday I couldn`t photograph it. You will see it on next Sunday, I promise.
So, here is my project for the 2nd Advent – Christmas teddy bear.
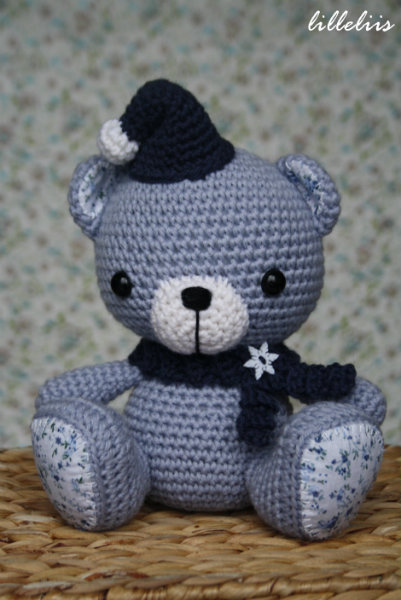
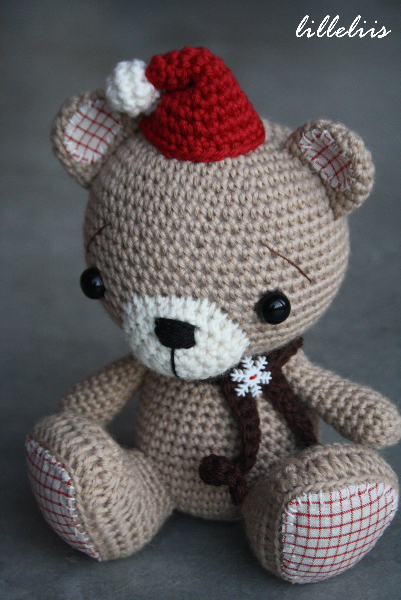
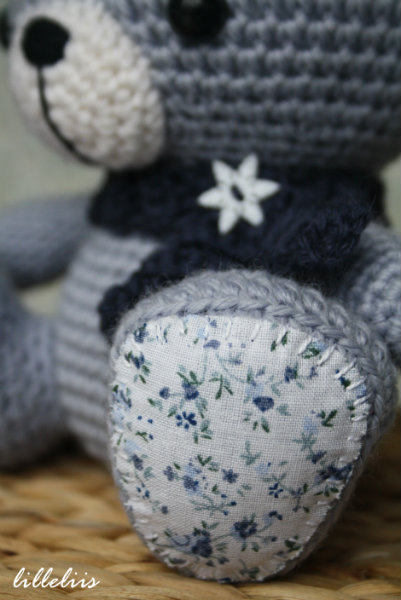
As you may notice it is one of the Amigurumi cuties, but I turned it into a Christmas toy. Adding a tiny elf hat is a simple way to turn any toy into a Christmas toy. I used the same idea already last year and made this teddy.
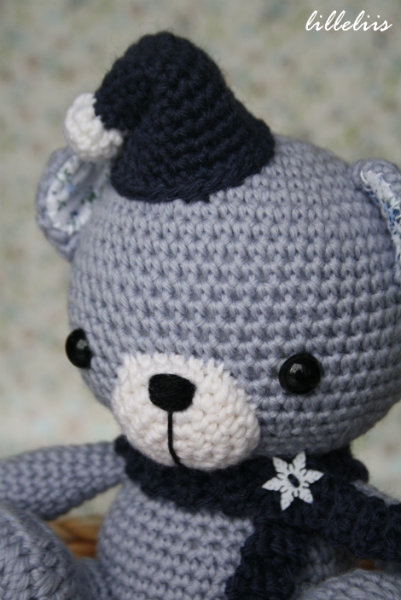
Perhaps I was a little untraditional with the colors, but I so much love this bear and I like these colors together, so for me it is the perfect Christmas teddy!
I also wrote a pattern for the hat. It is free, so be my guest to use it on any of your toys.
Tiny elf hat – free amigurumi pattern
Supplies
– a little amount of yarn – I used Drops Lima (50g = 90m), blue for the hat and white for the tassel.
– crochet hook 3,5 mm
– polyester fiberfill
Abbreviations
sc = single crochet, st(s) = stitch(es), rep = repeat
Work in continuous rounds. Do not join or turn unless otherwise instructed. It would be wise to use a stitch marker and place it in the first stitch of each round to mark the beginning of it.
HAT
1: Work 6 sc in a magic ring.
2: (Sc in the next st, 2 sc in the next st) rep 3 times = 9
3: Sc in each st around
4: (Sc in each of next 2 sts, 2 sc in the next st) rep 3 times = 12
5: Sc in each st around
6: (Sc in each of next 3 sts, 2 sc in the next st) rep 3 times = 15
7: Sc in each st around
8: (Sc in each of next 4 sts, 2 sc in the next st) rep 3 times = 18
9: Sc in each st around
10: (Sc in each of next 5 sts, 2 sc in the next st) rep 3 times = 21
11: Sc in each st around
12: (Sc in each of next 6 sts, 2 sc in the next st) rep 3 times = 24
13: Sc in each st around
Leave a long yarn tail for sewing.
TASSEL
1: Work 6 sc in a magic ring.
2: 2 sc in each st around = 12
3: Sc in each st around
4: Sc2tog around = 6
Leave a long yarn tail for sewing and attach the tassel to the hat. Add a tiny bit of fiber fill into the hat and sew it onto place. I like to bend down the top of the hat and attach it with some stitches so it will keep that way.
If anyone of you wants to share their Christmas projects then you may do it on the comments field :)