

Tips and tricks
How to use stitch markers in amigurumi crochet
Sep
In this post I am talking about how to use stitch markers in amigurumi crochet. I guess everybody who has ever made amigurumi, knows that counting rounds can be a real mess. We work in the spiral so it`s hard to understand where the rounds begin or end.
But it`s not only about marking the first stitch to help you count the rounds. The stitch marker can help you divide the pattern into sections and make working much easier.
In my 8 TIPS FOR AN AMIGURUMI BEGINNER, I have shared my special tips for getting the most of stitch markers. In this post I will explain them in detail and with more photos.
2 WAYS OF USING A STITCH MARKER
- Marking the first stitch of the round to help keep track of the rounds. This is unavoidable due to the nature of crocheting in the spiral. Although with experience you will probably learn how to find the beginning of the rounds without the stitch marker as well, it still makes working so much easier.
- Dividing the pattern in sections and keeping track with the help of the stitch marker. For example when working several rounds with the same amount of stitches, or having decreases regularly after every X amount of rounds. Let me illustrate this method with 2 examples:
- First, let`s say you have to work 20 rounds with the same amount of stitches (no increases or decreases). In this case I advise to change the position of the stitch marker after every 5 rounds. For example, after marking the first round, work 5 rounds and change the position of the stitch marker only when starting the 6th round. If replacing the stitch marker every round, you`ll soon find yourself confused of which round you`re at. However, when dividing those 20 rounds into 4 sections each consisting of 5 round, it`s much more systematic and easier to keep track on.
- Secondly, when it comes to increasing or decreasing stitches followed by a few rounds without any increase or decrease. Mark the round with the increase (or decrease) and work straight rounds without moving the stitch marker. This way it`s easy to understand where the stitches have been increased (decreased), and how many rounds you`ve worked after.
3 WAYS OF ATTACHING THE STITCH MARKER
Now lets take a closer look at how do you attach the stitch marker to your amigurumi piece. It can be positioned differently, for example horizontally or vertically. Here are the 3 versions you might want to try.
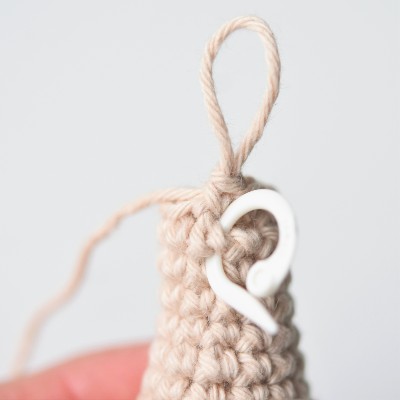
ON TOP OF THE STITCH
Perhaps the most obvious way of using the stitch marker, is to attach it on top of the stitch. It`s the same place where you normally work the stitches. Although it seems kind of the most logical way to use, there are many reasons why I don`t like this technique.
PROS
Easy to place.
CONS
When attaching the stitch marker on top of the stitch, you will have to replace it after every round so this method isn`t suitable for working in sections (see Two Ways Of Using A Stitch Marker above).
It falls off annoyingly easily, especially when working on smaller parts. This can be avoided if using a closable stitch marker.
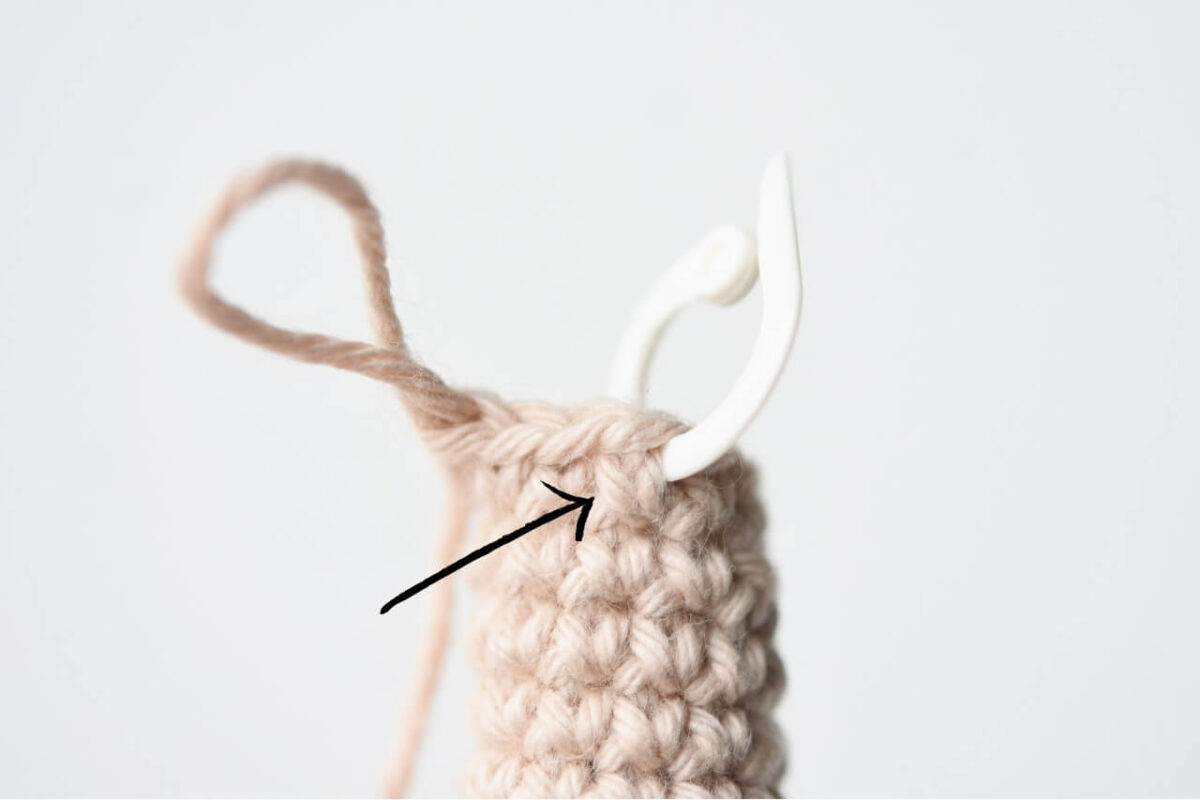
AROUND THE POST OF THE STITCH
With this method you will attach the stitch marker horizontally around the post of the first stitch of the round.
PROS
The good thing is that this method allows to keep the stitch marker in place for the amount of stitches needed, so no need to replace it every round.
CONS
What I don`t quite like is that you have to work 2 stitches at the beginning of the round to be able to fasten the stitch marker (maybe this is something that`s my personal issue).
Also, the stitch markers I´m using tear the stitch too much, and this leaves small noticeable gaps on either side of the stitch that I don`t really appreciate.
And there`s one more thing. As the stitch marker is positioned around the first stitch, it`s not the easiest way of reading the amount of rounds at the glimpse.
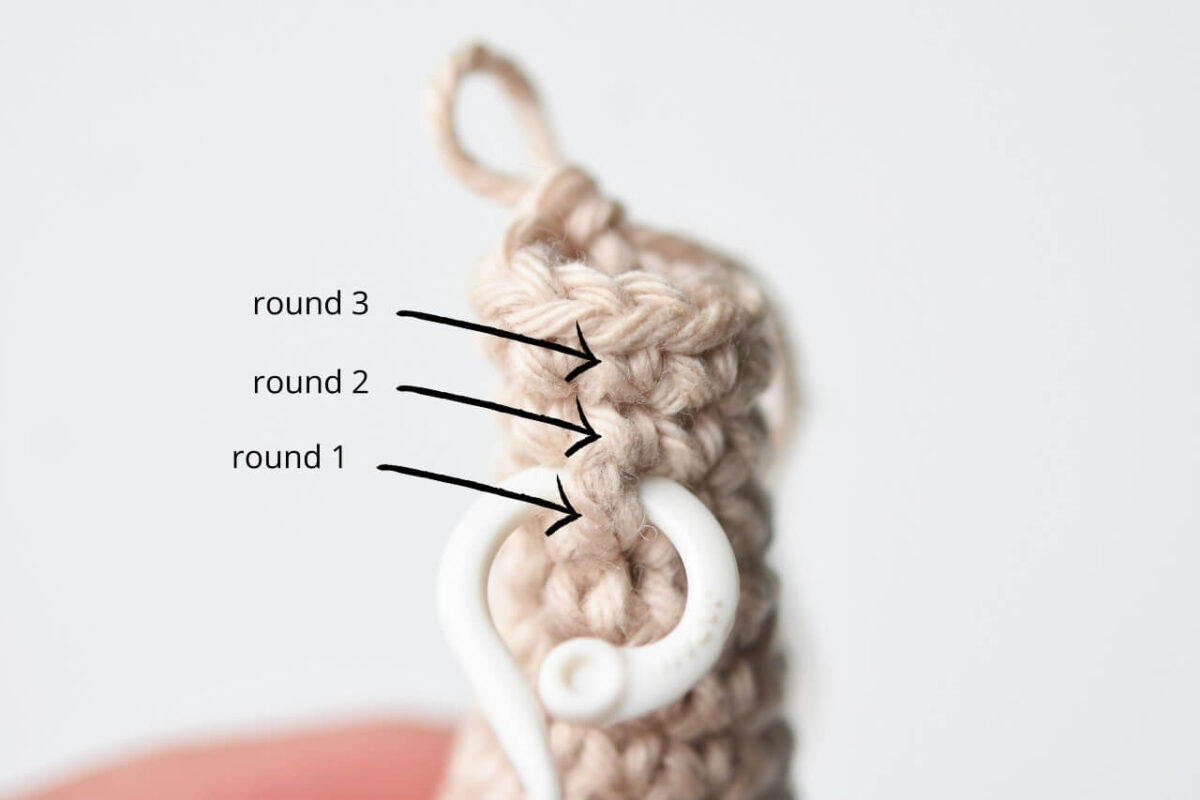
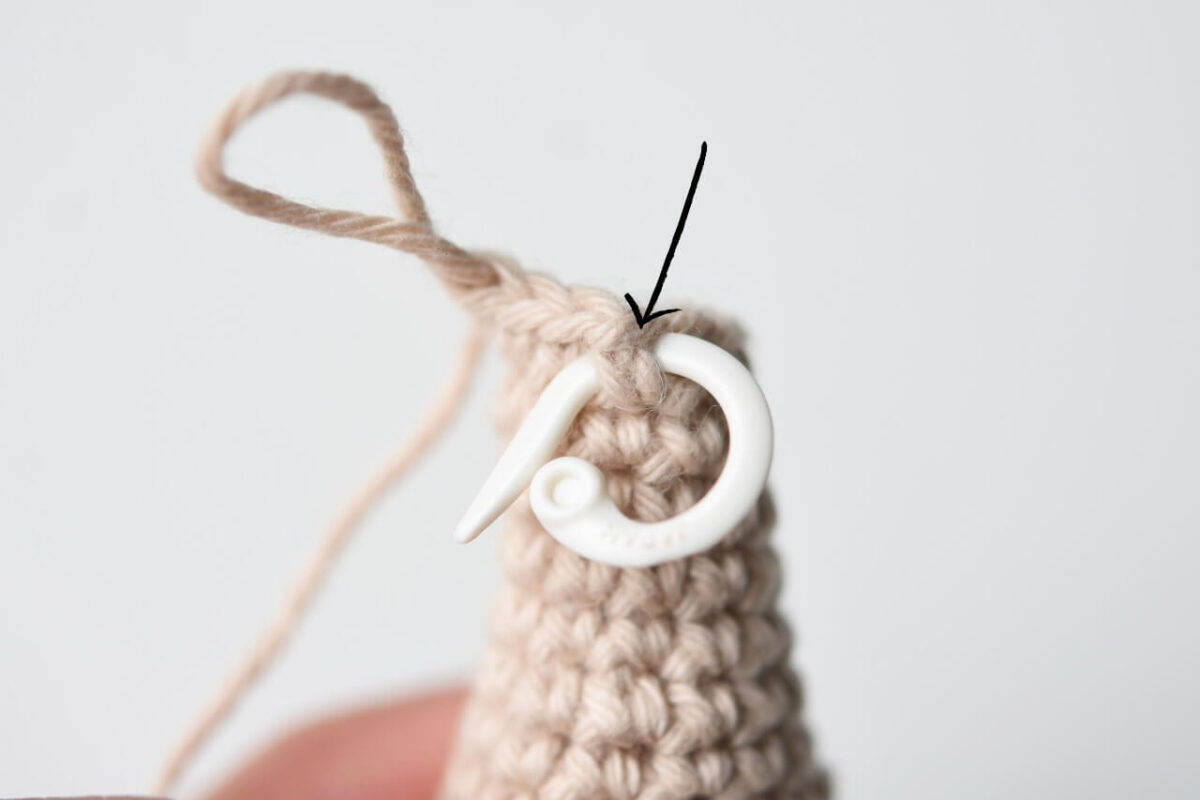
UNDER THE STITCH
In this case you will attach the stitch marker vertically under the first stitch of the round (which basically means around the first stitch of the previous round).
PROS
It doesn`t fall off, nor does it leave noticeable gaps between the stitches.
With this method it`s super easy to count the coming rounds so it`s perfect if you want to use it either for marking the first stitch and keeping track of the rounds, or dividing the pattern in parts and keeping track of the sections you`re working on.
CONS
No cons from me, cause it`s my absolute favorite technique!

Want to share your special tip about the usage of the stitch marker? Feel free to leave it in the comments.
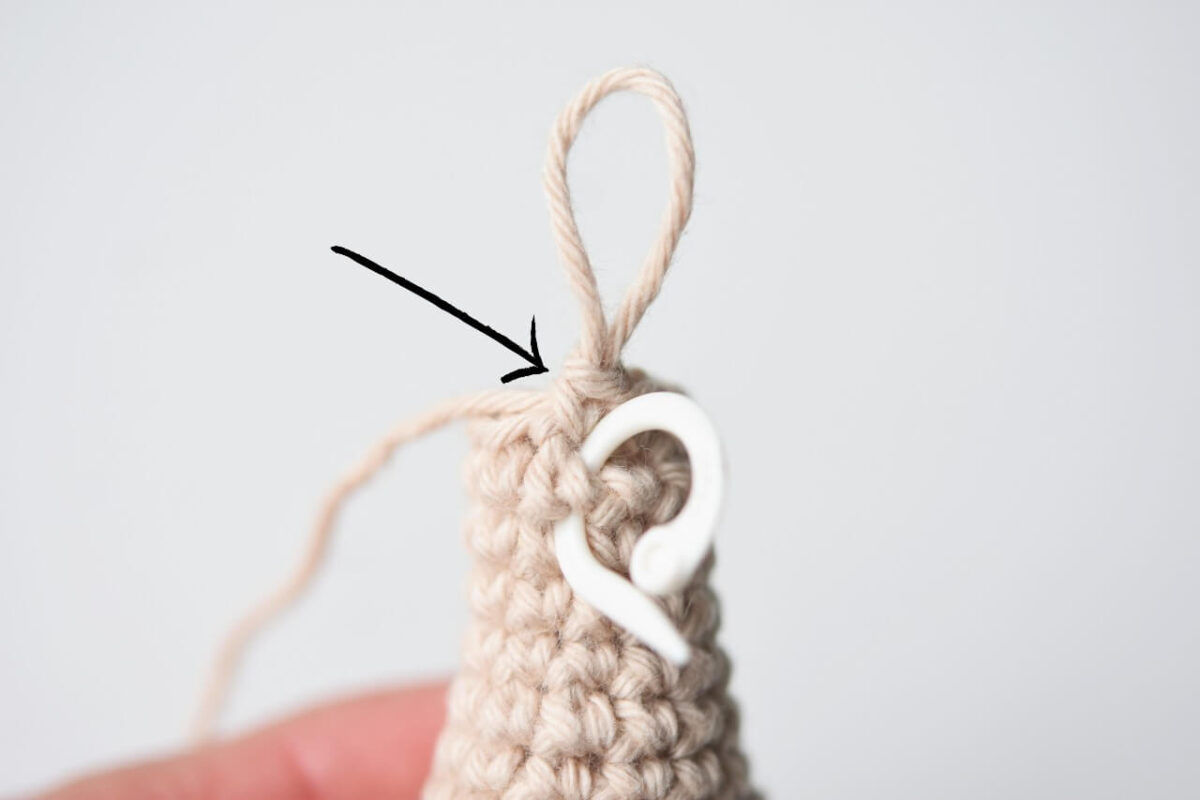
When I take my crochet in the car I am forever dropping my stitch markers so now I just make a longer tail on my yarn when I begin the magic circle and pull through 1st stitch of each new row.
Has been wonderful .
Yes, it`s my favorite way of marking the first rounds as well! But at some point I always switch to a stitch marker. Probably because the yarn tail simply becomes too short :)
I am quite experienced in crocheting and I’ve tried different ways to mark rounds using pins, a different color thread…
But what I like the most is to mark the first stitch of every round with a little rounded safety pin to avoid gaps and count rounds with a counter. Even though for rounds with few stitches I don’t even use it because it’s easy to keep track of the number of stitches.
I only use those bigger markers for the first stitch of magical rings, to keep a bigger gap, because I close the hole very tightly, and otherwise, I can’t insert my kook, no matter its size.
Another way to mark a stitch avoiding the big gap is to take only the back loop with the marker. But this is useful only if you change it every round. Otherwise, you can take the front loop instead, but the back one will stay hidden in case the gap is still too large.
Thanks for these tips!
I am going to try your favorite method. I find regular stitch markers very big for Amigurumi so tend to use a bright colored piece of contrasting yarn as my markers.