

Tips and tricks
How to stitch a mouth to your amigurumi doll?

Jan
I am going to show you how to stitch a smiley face to your amigurumi doll or animal or any other creature. There are different ways of doing that and none of them is right or wrong. Here is my version which I´ve been successfully using several years now.

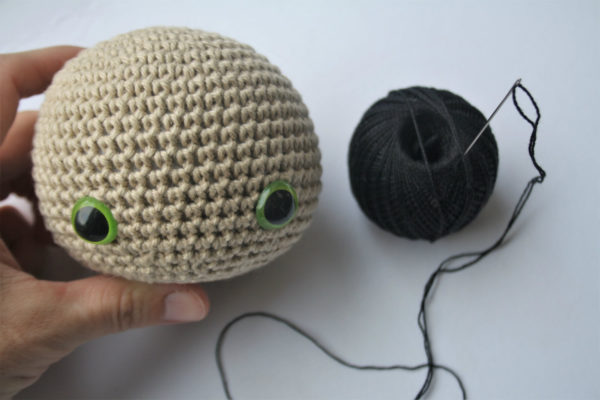
Supplies you`ll need:
- An embroidery needle
- Some thread or yarn. I like to use crochet cotton, for example “Pearl Cotton” by Anchor.
First you`ll need to decide how wide will the smile be. On the photos below I´ve tried the thread on the dolls face and as you can see they give a different expression.
When you`ve made your decision remember the places where you want to start and end the mouth. You can use pins for marking if you like.
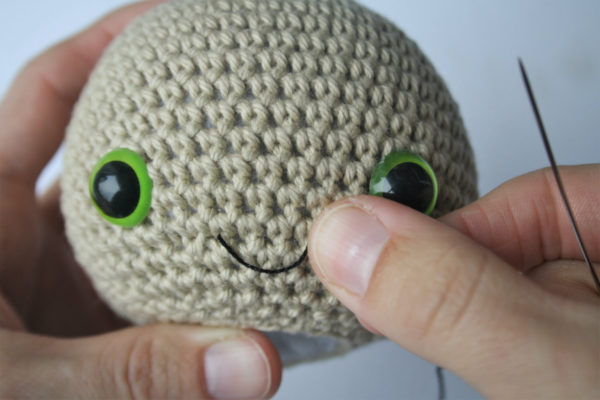
1. Insert the needle at the open part of the head and bring it out where you want to start the smile.
2. Insert the needle where you want to end the smile and bring it out at the open part of the head.
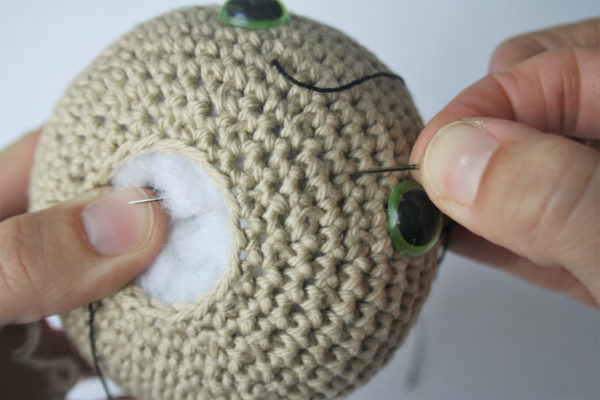
3. Pull the yarn though but not too tight. Leave a slight curve – that`s the smile!
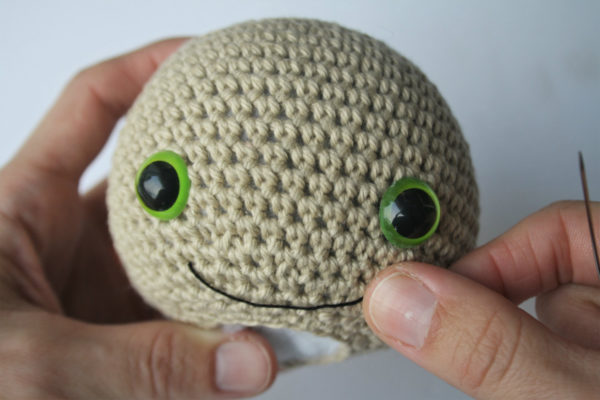
4. Again bring the needle out at the starting point and start twisting the rest of the thread clock-wise around the smile. Do that for 2-3 times.
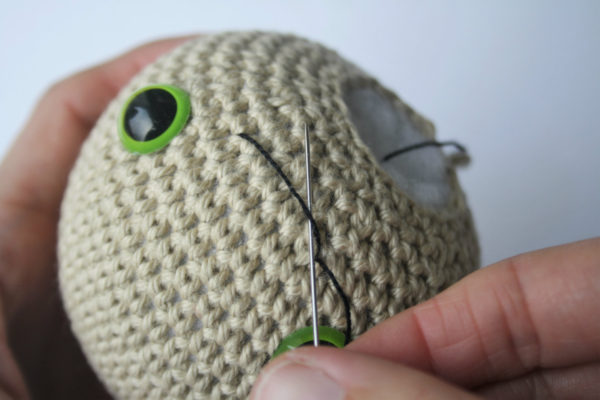

5. With the next twist grab just a little bit of the surface right where the smile touches the face. That fixes the mouth in it`s place and keeps it nicely curved.
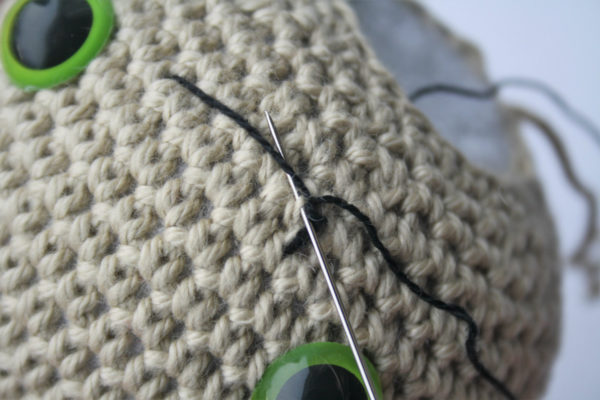
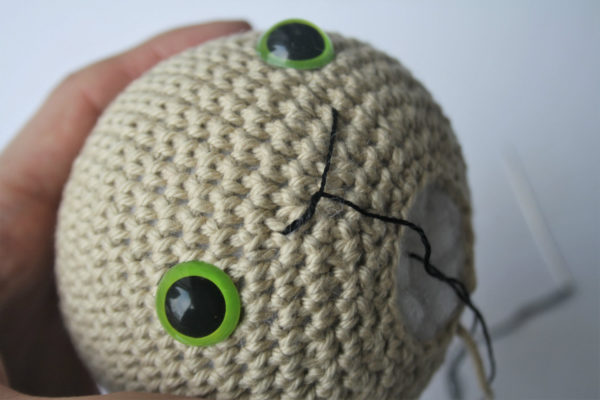
Repeat the last 2 steps until you`ve come to the end of the smile.
As the last step insert the needle and bring it out at the open part of the head.
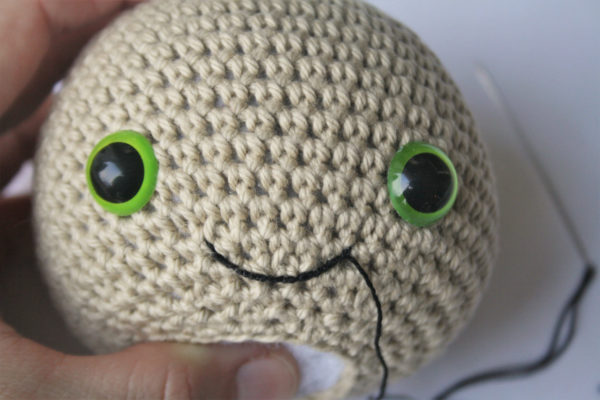
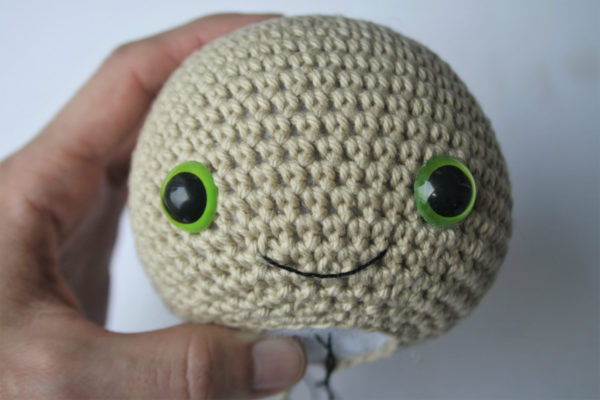
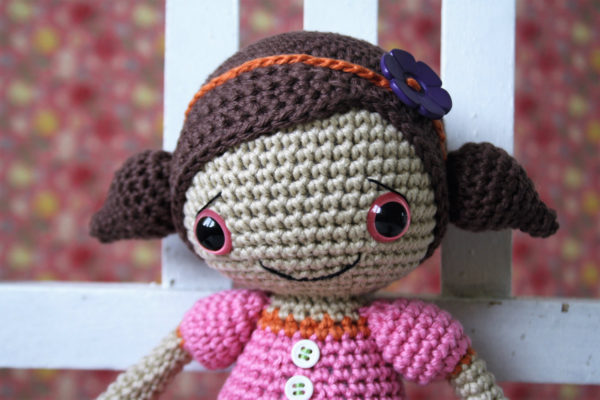
That`s what you`ll end up with! And here`s something you might create with that beautiful smile:
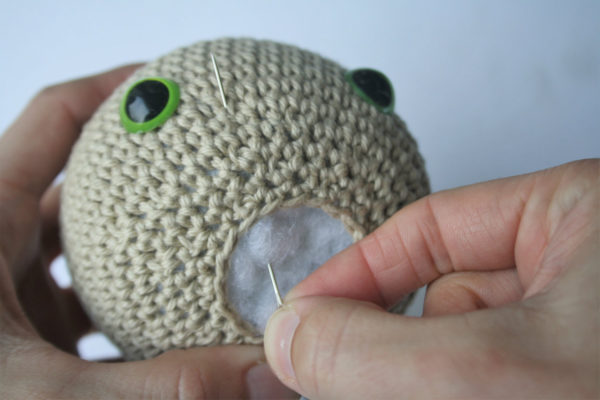
What if the amigurumi has a snout? The needle cant go out at the open part.
Then you need to manage with the stitch spaces. You can bring your needle out of the stitch spaces when needed and fasten the yarn tails with a secure not in the end. It`s uncomfortable but still possible.
Awesome! I will be adding onto my bookmarks
Köszönöm a sok szines horgolt állat képét ,nagyon szeretek horgolni !
Ha megkaphatnám legalább egy állat leírását és a fonal nevét ,hálás köszönetem érte !
Üdv.: Kissné Magdi
Thank you for an excellent tutorial! I’m never happy with my amigurumi mouths, now I can try this out and they’ll look great :-)
Wonderful tip! Thank you!
Thank you for sharing this. I will try it soon. It looks more durable then how i am making the mouth.
Much better way then what I’m doing. Thanks for the tip!
Thank you so much! I’ve even try to get a good mouth, but your way to do this is realy teh best way I think. Now I only need a perfect nose for rabbits or bears ;-)
Thank you!!!!!